nailsLost In Lipstick | A Beauty & Lifestyle Blog: nails
Showing posts with label nails. Show all posts

Monday, 27 October 2014

Izabelle Hammon Beauty Launch


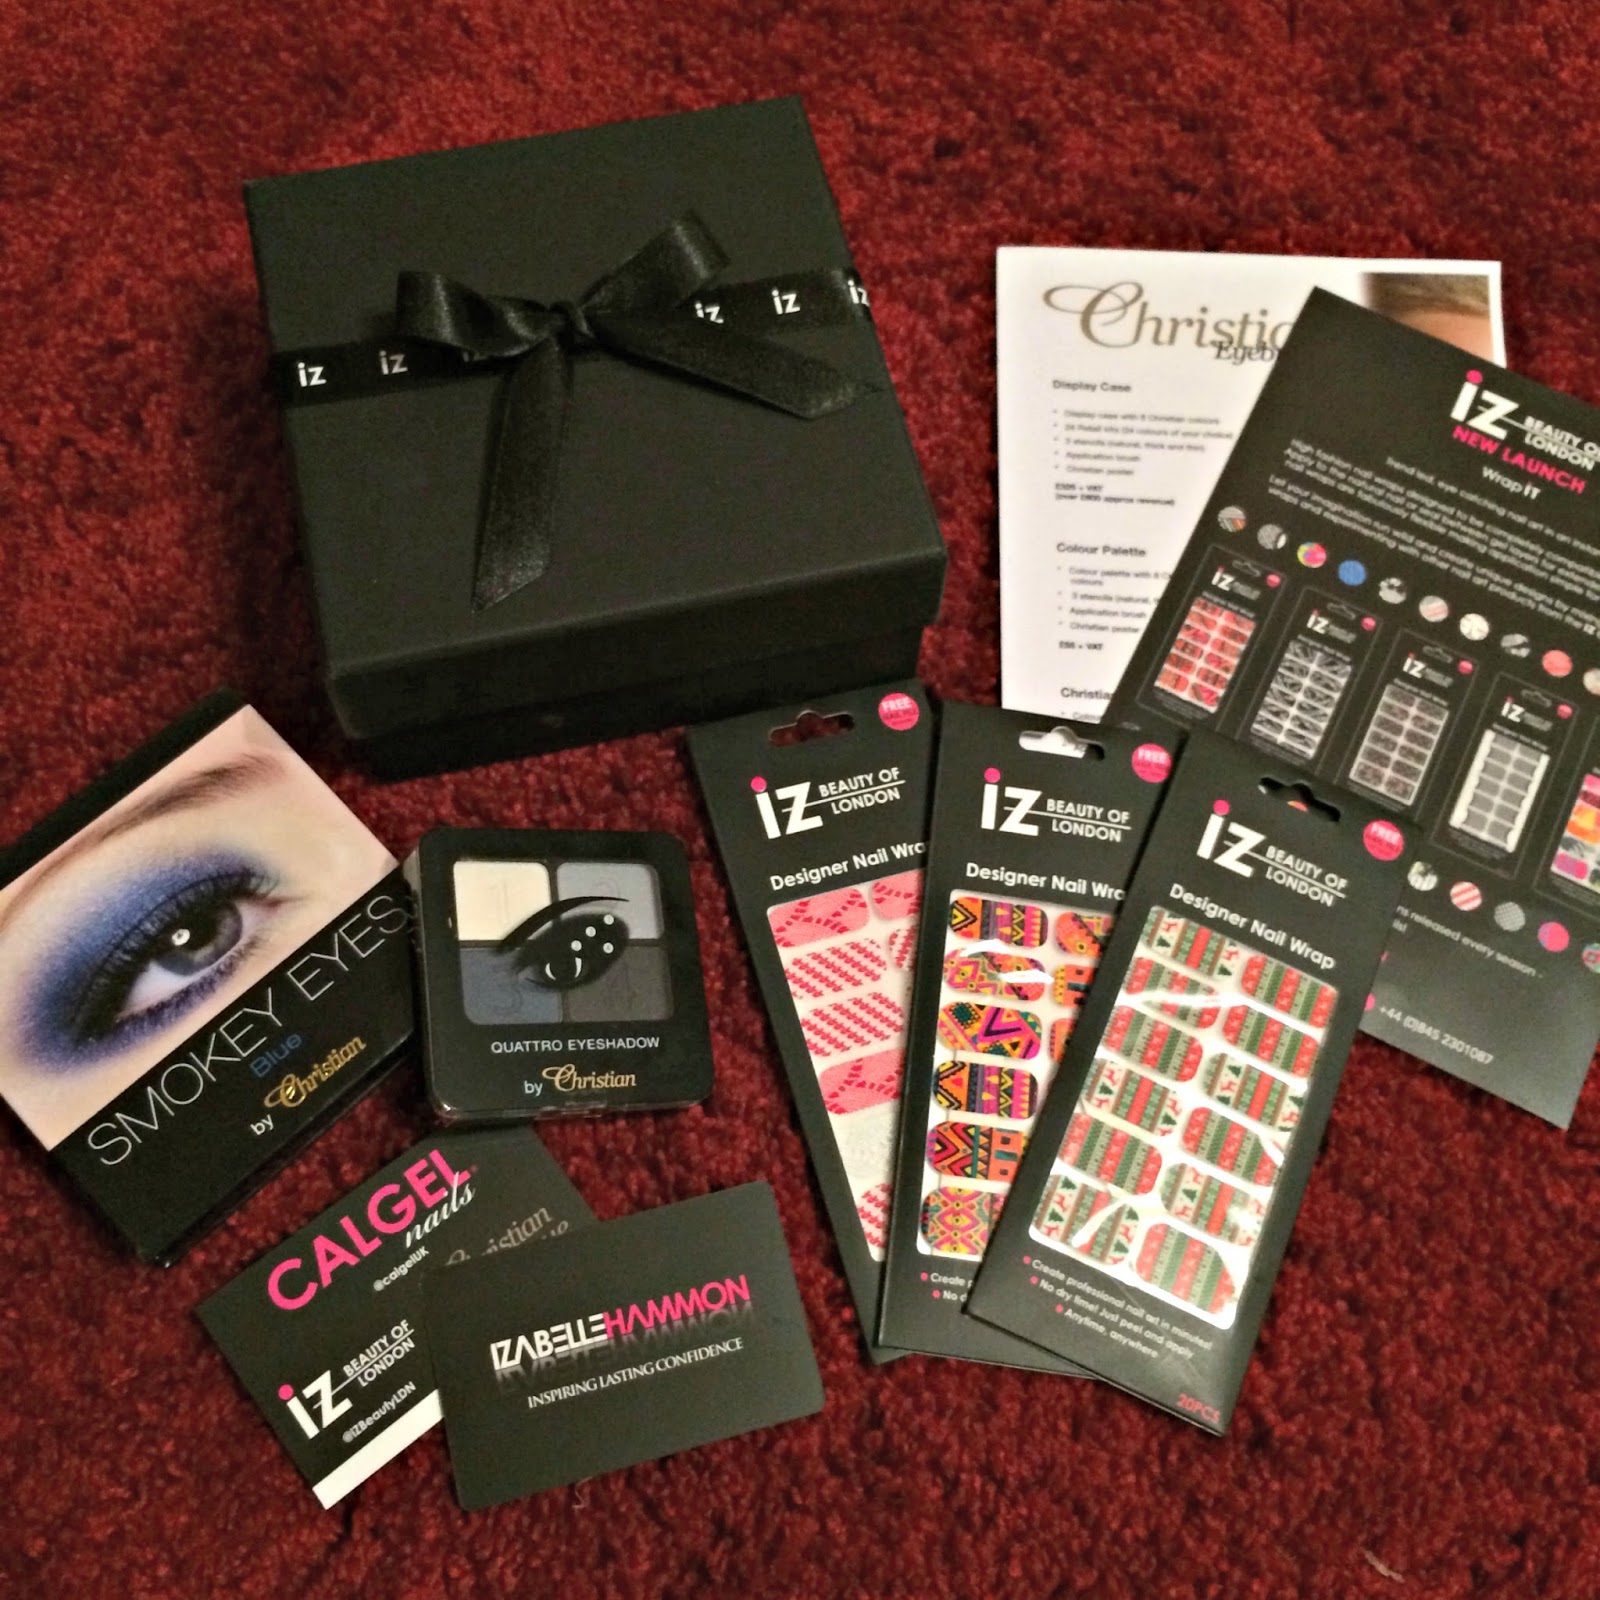
Last Sunday, I was invited to an exciting beauty launch party which was held at the beautiful Midland Hotel in Manchester. I have to admit that I hadn't heard of Izabelle Hammon, Calgel, Iz Beauty or Christian Beauty before but now I have and I have to say I'm very impressed. Iz Beauty consists of nail art products including a LED/UV gel, embellishments, nail wraps and nail art pens. Calgel is a one phase gel nail system which is designed to maintain the condition of the natural nail. Finally, Christian Beauty specialise in eye products and on the day we were introduced to their eyebrow products. 

The purpose of the event was to preview the upcoming collections, master class workshops and seminars led by Izabelle Hammon herself. We had the opportunity to look at all the amazing nail art products and we were very kindly given a box to fill with amazing products like nail wraps, stickers, nail art pens and studs to try at home. I cannot wait to start experimenting and getting creative with my nails!

Calgel were on hand to give us a demonstration. I was lucky enough to have the full experience and opted for the gorgeous shade Model Behaviour which is a vibrant, blue toned purple. A week on and it's still looking as vibrant and glossy as it was the day I had it done. I've actually done housework and built some IKEA furniture with no chips or scratches. Calgel isn't available to buy to use at home as it's only available to people who have had the official training. There are plenty of salons which offer Calgel nails and a quick Google search will allow to find one near to you. 

Also, I was colour matched to find out which shade I was from the Christian eyebrow range. There are eight shades in total and they are available to buy as a kit which include one shade, three stencils and an application brush. They're revolutionary water resistant eyebrow powder that can be used to create defined, yet natural, brows in seconds. Lasting up to 24 hours this clay based powder adheres to the skin, filling in and transforming sparse, thin and pale eyebrows.

Any blogger event wouldn't be complete without a photobooth, cupcakes, a sweet table and prosecco! We were well and truly spoilt. Thank you so much for such a fantastic day and for introducing me to some fabulous new products. I have lots of nail art products to try so look out for those in future blog posts. You can find out more about Izabelle Hammon here and if you fancy trying any products for yourself, you can via the online shop found here.

Rachel x

Saturday, 11 January 2014

Top Tip - How To Remove Glitter Nail Polish

Along with every beauty blogger out there, I love wearing nail polish and even though I'm 26, I love to apply glitter nail polish. It just adds that extra sparkle to an outfit especially in the festive season or another celebration. However, applying nail polish can only mean one thing - a few days later, you need to remove said nail polish! The purchase of Bourjois Magic Nail Polish Remover took away the hassle of scrubbing your nails and it truly is magical until you need to remove glitter polish! It just doesn't work and instead it snags on the sponge. Trying to remove it the regular way, takes forever, uses about 100 pieces of cotton wool and your hands ache from scrubbing so hard! Follow this simple tip to minimise effort and it leaves zero amount of glitter on your nails. Seriously, it's takes less than 10 minutes, which sounds long, but you can just sit back and relax while it works it's magic!


You will need; cotton wool, nail polish remover (mine cost 99p from Morrisons!), kitchen foil and a pair of scissors. 


At Christmas and New Year, I love to wear glitter nail polish. If you can't wear glitter and sequins then, when can you?! Please excuse how chipped my nail polish is here. This was after a week of wear and I have a very naughty habit of picking off my nail polish! I only took the photo so you could see before and after!


The first step is to get your cotton wool. I only use five pieces of cotton wool as I cut them in half and just use a half per nail.


The next step is to take the kitchen foil and cut/tear it into strips that are long enough to wrap around your fingers. These will hold the cotton wool in place.


Once you have all your cotton wool and kitchen foil ready, you are ready to start. Take one piece of cotton wool and apply the nail polish remover.


Wrap the piece of cotton wool around your nail, making sure all of your nail polish is covered. Hold it at the back with you index finger on the same hand.


Take a piece of kitchen foil and wrap around your finger, on top of the cotton wool. This holds the cotton wool in place for the amount of time needed. 


Repeat for all of your other fingers. I usually do one hand at a time so I have a hand free to go on twitter or instagram!


Once all nails are covered, sit back and relax. You could also do this while you had a face mask on. I tend to leave mine on for 10 minutes just to be sure that all the nail polish has gone. If you wanted, you could experiment and test how long is actually needed. 


Once 10 minutes is up, removing the cotton wool and kitchen foil and you should be left with nail polish free nails. At this stage, I repeat with my other hand and once all my nails are clean, I wash my hands. I can't be the only one who has accidentally tasted nail polish remover because I haven't washed my hands afterwards. I also use a hand and nail cream and massage it into my nails to put back any moisture that the remover may have taken away. 

Have you ever used this method before? Do you have any other tips for removing nail polish?

Rachel x
Lost In Lipstick

Follow me on Twitter // Like me on Facebook // Follow me on Bloglovin' // Follow me on Instagram

Thursday, 17 January 2013

MUA Nail Polish in Amaretto Crush - Review


Yes, you read that correctly! £1! Bargain! This is one of MUA's newer shades, released in Autumn 2012. A lot of people have said they prefer the new shades as they have names rather than numbers. To be honest it doesn't particularly bother me but naming a nail polish a number is pretty boring. MUA is such an affordable brand for everyone, does it really matter? 

This is the first nail polish I have bought from MUA but I thought it was time I give them a try as I have used so many of their other products and loved them. One thing that put me off is the size of the bottle. It's tiny and doesn't fit nicely in my nail polish collection! OCD! Again it's only £1 and lets be honest, do we really use all the nail polish in a larger bottle or does it go off before we get chance to! I know mine does, it usually dries out, but I have a large nail polish collection!

The polish is actually really good quality for £1. I was pleasantly surprised. One thing that annoyed me was the small brush but that's down to the small bottle. It was quite difficult to apply with such a small brush. The polish, at first, applied a little textured but soon smoothed out. I only needed two coats and the colour was opaque. I used Models Own 3-in-1 as a base coat and as I was in a hurry, I didn't apply a top coat. Without a top coat, it lasted two days before it began to chip because of housework! So with a top coat I reckon it would last about 4 days, which is totally amazing for £1! 

I will definitely purchase more shades of nail polish from MUA. I do wish the bottles were the standard size so they wouldn't look so out of place in my collection. I would pay more. Maybe if they double the size and double the price!

Have you tried any nail polish from MUA? Which shades do you recommend?

Rachel x
Lost In Lipstick

Thursday, 8 November 2012

Bourjois Magic Nail Polish Remover - Review


This is another product that I purchased after reading many positive reviews. Removing nail polish is a chore for me and I had previously never come across a product that worked so well. Most other nail polish removers stink and take ages to remove the polish. Also, I cannot stand the cotton wool breaking up into pieces. I decided enough was enough and purchased this highly raved about product.

Once I got home, I decided to remove my nail polish straight away as it was chipped and had been on almost a week. I was sceptical about just how 'magic' this remover was and really didn't believe it could remove my nail polish in 1 second!

The instructions are 'dip each finger into the sponge, twist and remove.' It really is that easy! Although in my opinion, you need to twist several times to remove all the polish. The remover actually smells pleasant and has a sweet smell. (I do not recommend putting the product really close to your nose and sniffing as it is a bit overpowering!) The scent is red fruit and vanilla. Although the remover contains nourishing sweet almond oil, which I can definitely smell over the red fruit and vanilla. The almond oil really is nourishing and makes your nails feel so healthy. It also doesn't dry your nails out, which is obviously a good thing!

In my opinion a second is a bit generous! I would say it takes a minute or so to remover the polish from one nail completely. Especially if you have a base coat, two coats of polish and a top coat. It just takes a few extra minutes to work through those layers. For me this isn't a problem as it's so easy and convenient. It's just a little misleading to say it only takes a second.

Also, if you remover glitter nail varnish with this it takes a little longer and glitter particles will be left on the sponge. This means that in the future when you use it, you will have glitter on your fingers. I really don't see this as a problem as I wash my hands afterwards meaning I wash away any glitter.

I 100% recommend this product. It's fully removes nail polish in a few minutes (not one second!), it's quick and easy and you can do it on the go. It also means you don't need cotton wool and overall makes less mess!

Have you tried Bourjois Magic Nail Polish Remover? What are you opinions?

Rachel x
Lost In Lipstick

Wednesday, 7 November 2012

October Favourites


Real Techniques Expert Face Brush £9.99 - Altogether I own 5 Real Techniques brushes - the Powder Brush, the Foundation Brush, the Blush Brush, the Setting Brush and this one. I love every single one and I completely understand all the hype surrounding them. I bought this brush to use with my liquid foundation, as I wasn't happy with the Foundation Brush. I had read that this brush provides more coverage with liquid foundation, which was exactly what I wanted. I now use the Foundation Brush with my concealer and I love how it blends and reaches in those hard to reach areas.

Collection Lasting Perfection Concealer £4.19 - This concealer is the best drugstore concealer I have ever tried! It is well worth the hype all around the Blogosphere. The price is fantastic and it provides great coverage for quite a few hours. I find it's too heavy for under the eye area. Instead I use Collection Illuminating Touch Brightening Concealer for under the eye area. I 100% recommend this concealer to everyone!

Rimmel Precious Stones Glitter Nail Polish in Diamond Dust £3.99 - I love glitter nail polish, although I hate taking it off! I cannot wait till nearer Christmas when I can get away with pairing it with red. The two negative points are that the polish dries extremely matte but this is nothing that a top coat cannot solve and the fact that it doesn't last very long. Even with a top coat, I got two days wear before it started to chip. But for the price, this is fab and I love the fact that it has different sizes of glitter particles.

Topshop Lipstick in Rumour Has It £8 - This is the second Topshop lipstick that I have purchased. The first was Mink, which I bought about a year and a half ago. I love both of the shades, maybe Rumour Has It a little more as I can wear it more on a daily basis. The texture of the lipstick is creamy and it glides onto the lips smoothly, providing moisture. The lipstick lasts a few hours before it needs reapplying. I definitely want more Topshop lipsticks, which shade do you recommend?

No7 Stay Perfect Foundation £14 - You can read my review here. I have been using this foundation every day since I got it. I love it. The shade is perfect for my skin tone as I had it matched. You can also read my views of the Match Made Service on my review of the foundation. It provides great coverage, which means I only need to dab a teeny tiny bit of concealer on my blemishes. I 100% recommend going to boots and having a foundation consultation. It's free!

Liz Earle Instant Boost Skin Tonic £12.50 -You can read my review here. I love Liz Earle products, I have been using all the products in the Essentials now for several months. They have improved my skin so much. The Skin Tonic works like a toner but it doesn't have any alcohol in it so it won't dry your face out. I use it straight after Cleanse & Polish but before moisturising. I also use it throughout the day, as a spray, if I need refreshing and a quick boost.

Have you tried any of these products? What are you favourite products this month? 
Rachel x
Lost in Lipstick 

Thursday, 18 October 2012

Wish List #3

Wish List #3


Bourjois Volumizer Mascara - I have read fantastic reviews about this online. I desperately want to try it for myself! Is it worth the hype? £10.49

Topshop Nail Polish in Granite - I only have one Topshop Nail Polish at the moment, Pool Party (you can see my review here) but I am impressed with everything about it and this shade looks perfect for Autumn/Winter. £6.50

Real Techniques Core Collection - I mainly want this for the Buffing Brush but the whole collection looks lovely. I am so impressed with Real Techniques brushes. I currently have the Foundation Brush and Powder Brush (you can see my review here). This is a bargain in my opinion as it's only £21.99 and includes 4 full size brushes and a case.

Smashbox Photo Finish Foundation Primer Light - This product is everywhere I look at the moment! I have chosen the light version as I suffer from spots and it's oil free. £25 (but you can buy travel sizes to try).

MUA The Artiste Collection - I am in love with MUA. Every single product that I have tried has impressed me and been of fantastic quality for low prices. How do they do it? This is one of the newer products and just looks beautiful! It's another bargain for £6!

What products are on your wish list? Have you used any of these products? Are they worth buying/the hype?

Rachel x
Lost In Lipstick


Saturday, 29 September 2012

Topshop Nail Polish in Pool Party - Review


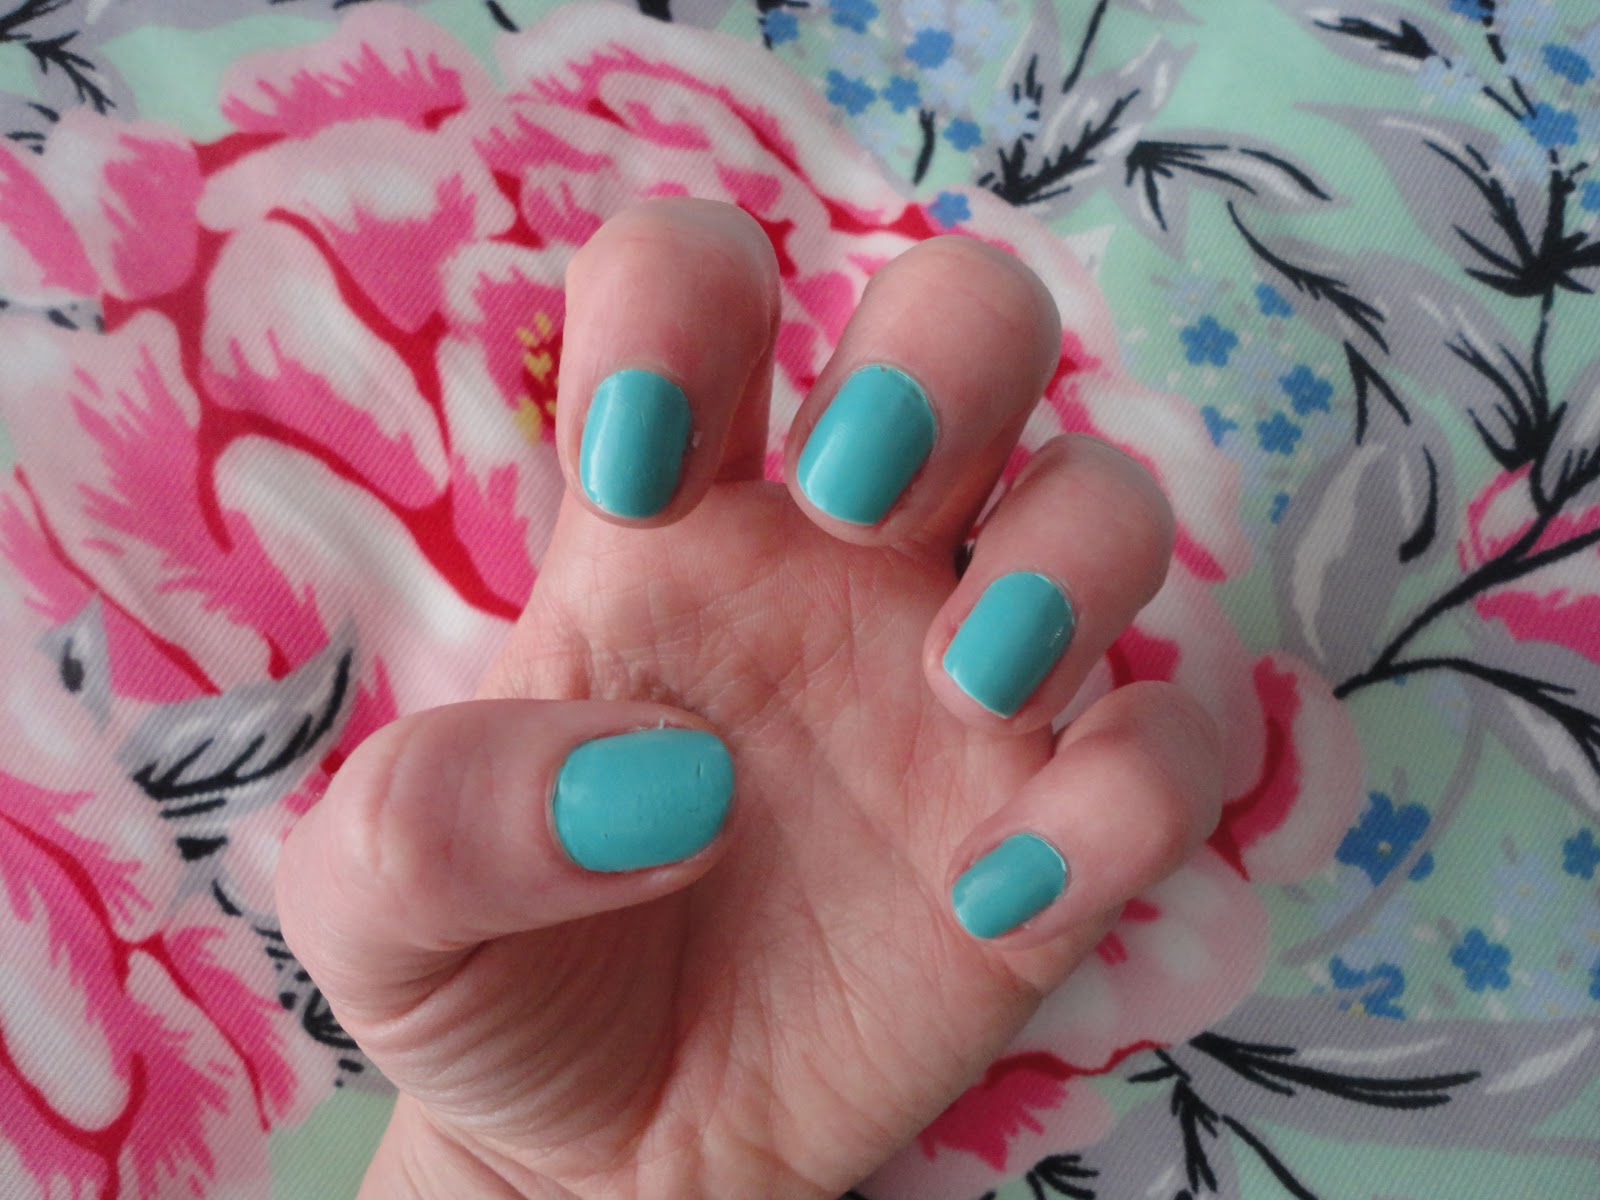
I saw a couple of pictures online and reviews on others people's blogs of this nail polish and I had to get it! It is a turquoise shade, with a slightly stronger hint of green, I love it! It retails at £5, which is a bargain. The nail polish is a nice creamy texture and is opaque in two coats. The brush is good, ensuring a smooth, even application of the polish. It dried fairly quickly in between coats, which is always a good thing! The finish isn't high gloss, but it isn't matte either. If you are looking for high gloss, a good top coat will finish it off nicely. I applied this on Wednesday, without a top coat, and it lasted until Friday before chipping. I reckon this is good going and with a top coat it will last a few days, maybe a week. (Please bare in mind this was without doing any housework!) This is the first Topshop nail polish that I have tried, and I will be buying more.

(I am looking for a mint nail polish - if anyone has any recommendations, besides Essie, please let me know.)

What do you think of the colour? Have you tried any of the Topshop nail polishes?

Rachel x
Lost In Lipstick


Saturday, 15 September 2012

September Favourites


Barry M Magnetic Nail Effects in Blue £4.99 - My sister bought this for me for my birthday, after using it once, I went out and bought three other shades! The quality of the nail polish is excellent and could be worn without the effects. But once the magnet is used, the effect is just out of this world! I got so many compliments on my nails and I cannot wait to try the other shades.

Models Own Glitter Nail Polish in Disco Mix £5 - I love glitter nail polish, who doesn't?! But boy is it hard to remove! This looks lovely over blue or purple nail polish with just one coat, as the particles of glitter are purple and blue. I used three coats to completely cover my nails in glitter and it looks amazing. I definitely want to try the Mirrorball collection, £20 for 6 nail polishes is a bargain!

MUA Pro Undressed Palette £4 - Read my review here. This is the best dupe of Urban Decay ever! The quality of the eye shadows are amazing and actually stay put for several hours. There are enough matte and shimmer shadows to suit everyone and you can create so many different looks by using different combinations of the 12 shades.

MAC Lipstick in Creme Cup £14 - This is actually my first ever MAC lipstick believe it or not! The texture is so creamy and moisturising and the colour stays put for hours. This lipstick has a shine so it may not suit everyone's tastes, but the shade is perfect for daytime or evening. I will be posting a review on this soon so look out for it!

Benefit the POREfessional £23.50 - This is a sample I received with Glamour magazine. It's the first time I've used POREfessional and I will definitely be purchasing it once this has an out. The texture is lovely and provides the perfect base for my make up. I don't suffer from massive pores, just small ones on my cheeks and a few on my forehead, POREfessional just helps to conceal these while being a perfect primer.

Liz Earle Cleanse & Polish Hot Cloth Cleanser £14.25 - I have been using Liz Earle Cleanse and Polish since December 2011 and my skin has never been so good! In May 2012 I added the Skin Tonic and Light Moisturiser to my routine, my skin is so smooth and my spots have cleared up a lot, I still have a few breakouts. I will be posting a review on this soon so look out for it!

Have you tried any of these products? What are you favourite products this month? 

Rachel x
Lost in Lipstick 

Thursday, 13 September 2012

Barry M Croc Nail Effects Nail Paint - Review


Two years ago, when I first tried 'crackle' nail polish I loved it and was addicted. I had it on my nails everyday! I always received compliments from the public when I was out, asking how I did my nails or even where I had them done! It was always entertaining to see their face when I said I did them myself! Fast forward a year or so and people seemed to be a bit bored with 'crackle' nails, I think they had probably been over done. To be honest though, I still love the original crackle polish over gold nail polish, I just think the effect is so striking. 

Fast forward to 2012, and Barry M have created a new version of crackle nail polish, Croc Nail Effects which creates a mock-croc style pattern. The polish is currently available in Black or Burgundy. Personally, I went for black as it goes better with more colours.

Instructions are included on the side of the bottle, these are:
1.Apply a thin coat of your chosen nail vanish.
2. Wait 1 to 2 minutes until mails are touch try. Do not apply to dry polish.
3. Apply a thin coat of Croc Nail Effects.
4.After 3 minutes the effect will start to appear.

When painting my nails, I always start with a base coat as some nail polishes stain and yellow nails are not a good look! So I began with a base coat and let this completely dry. I then followed step 1. I chose 17 High Gloss Nail Polish in Sphinx. I applied one thin-ish coat of nail polish and waiting about two minutes before applying Croc Nail Effects.


 You are instructed to apply a thin coat of Croc Nail Effects, however I found this difficult as I wanted to ensure the whole nail had been coated. Once all my nails were black it was just a case of waiting. The bottle says after 3 minutes the effect will start to appear. This seems like a long time, as the original crackle polish is instant, however from looking at the lid of the bottle I thought it was worth the wait. I had read a few reviews before painting my nails, some suggested the effect doesn't appear till after 5 minutes! Others suggested using a hair dryer to speed up the process, although a few people said this made the shapes on the nail smaller and not as effective. So I followed the instructions and waited. The following pictures show the effect 'developing' over 5 to 6 minutes.


This is the first time I have used Croc Nail Effects and to be honest, I am not impressed. The effect looks nothing like mock-croc or the lid for that matter! In my opinion, I followed the instructions and I did not achieve the desired effect. It kind of looks like I've used a mega cheap brand to create the crackle effect and my sister said my nails offend her! I will give it another chance and try again a few times. I think next time I will try to paint the Croc Nail Effects on thinner. And I'll probably give the hair dryer suggestion a go!


Have you used Croc Nail Effects? Did you get the desired result?

Rachel x
Lost In Lipstick

Related Posts Plugin for WordPress, Blogger...